
Assessing a leaky faucet in your Arvada bathroom is key for successful DIY Bathroom Faucet Installation. Identify the source through visual inspection and understand water supply shut-off procedures to prevent flooding. Disassemble the old faucet carefully, document steps, and organize parts. Gather compatible repair kits, shut off water, disassemble existing components, install new ones, and test functionality. Optimize water pressure (45-60 psi) for improved performance and conservation. Regular maintenance ensures a leak-free, efficient bathroom faucet for years to come.
A leaky faucet can disrupt your daily routine and waste precious water—a growing concern for many homeowners. In the quest to address this issue swiftly, effective solutions are key. This article guides you through a straightforward process to fix your bathroom faucet installation Arvada without unnecessary complications. We’ll walk you through identifying the problem, gathering the right tools, and following simple steps to ensure a successful repair. By the end, you’ll be equipped with the knowledge to tackle future maintenance tasks with confidence.
- Assess the Leaky Faucet: Identify the Source
- Gather Tools and Materials for Bathroom Faucet Installation Arvada
- Turn Off Water Supply to Prevent Flooding
- Remove Existing Faucet Components with Ease
- Install New Faucet Parts: Step-by-Step Guide
- Test and Adjust Water Pressure for Optimal Performance
Assess the Leaky Faucet: Identify the Source
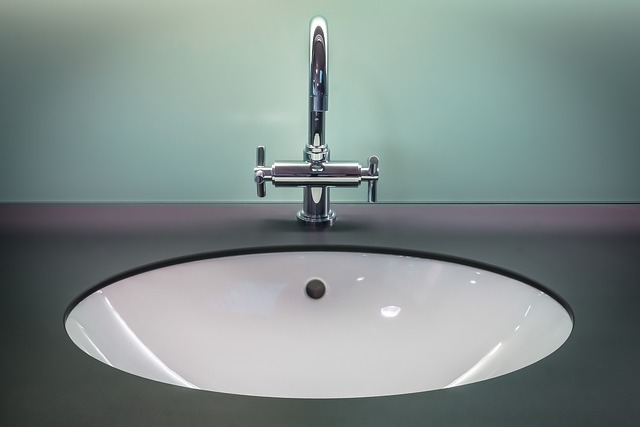
Assessing your leaky faucet is the first step towards a successful fix, especially when aiming for a DIY bathroom faucet installation Arvada. The source of the leak can vary widely, from a simple washer replacement to more complex issues like damaged or misaligned parts. Start by observing the faucet’s behavior. Is the leak constant or intermittent? Does it occur at specific times, such as during cold water use? These insights can guide your troubleshooting process.
Visually inspect the faucet for common problem areas. One of the most frequent causes of leaks is a worn-out washer or O-ring, which are relatively easy to replace. Remove the faucet handle and check these components; they often need tightening or swapping out. If the leak persists, look for damage to the spout or cartridge, especially in older faucets. In more modern designs, such as handcrafted copper faucets, leaks might indicate misalignment or damaged seals, requiring a more meticulous approach to repair.
For instance, trendy bathroom faucet designs with intricate details may demand specialized knowledge and tools for disassembly and reassembly. Data shows that proper identification of the leak’s source can save time and money, preventing unnecessary parts replacements. Remember, if your old faucet is in good condition but needs removal for a new installation, ensure you have the right tools to do so without causing damage. This careful assessment will set the foundation for a successful bathroom faucet installation Arvada or prompt you to consult a professional for complex repairs.
Gather Tools and Materials for Bathroom Faucet Installation Arvada

When it comes to fixing a leaky faucet in your Arvada bathroom, having the right tools and materials is crucial for a successful DIY installation or repair. For a Moen single-handle faucet, which is a common choice for many homes, you’ll need a few essential items to ensure a smooth process. Start by gathering a new faucet, including all necessary components, such as supply lines and an aerator. Also, obtain the appropriate tools like adjustable pliers, a wrench suitable for your faucet size, and a screwdriver compatible with your sink’s hardware.
Before beginning the bathroom faucet installation Arvada, take time to consider the various mounting options available for sinks. These include clip-on, threaded, or surface-mount fixtures, each with its own advantages. For instance, extended faucet warranties often come with specific installation requirements, so ensure your chosen option aligns with these guidelines. Remember, proper preparation is key to a stress-free DIY project.
Once your tools and materials are ready, follow the manufacturer’s instructions for installation or repair. Sink faucet installation tips include marking water lines before disconnecting them and using pipe compound for secure connections. By taking a systematic approach, you can efficiently complete the job, ensuring your Arvada bathroom faucet functions flawlessly while potentially saving you on professional services.
Turn Off Water Supply to Prevent Flooding

Preventing flooding is a crucial step when fixing a leaky faucet, especially for those dealing with bathroom faucet installation Arvada. The first line of defense is understanding and shutting off your water supply. This simple act can save you from extensive water damage and costly repairs. Typically, your home’s water supply is controlled by a shut-off valve beneath the sink or in a nearby utility room. Locate this valve—it’s often a cylindrical lever or wheel—and twist it clockwise to close the faucet’s water flow. It’s a quick process, but one that can save you significant headaches down the line.
Local faucet repair services Arvada often emphasize the importance of this step during their consultations. Many professionals recommend checking and shutting off the water supply before attempting any repair work. This simple precaution ensures that your efforts are not hindered by an unexpected burst of water. Additionally, with extended faucet warranty options available, prioritizing valve maintenance can help you avoid out-of-pocket expenses for future repairs.
Step-by-step video guides for faucet installation—whether for a new fixture or a replacement—frequently highlight the significance of this initial step. These visual aids demonstrate how quickly and easily the water supply can be turned off, making it an accessible task for even novice DIY enthusiasts. Remember, proper preparation prevents persistent problems. By taking this simple measure, you’re not just fixing a leak but also ensuring your home remains dry and safe.
Remove Existing Faucet Components with Ease

Removing existing faucet components is a crucial step in any bathroom faucet installation Arvada process, and with the right approach, it can be a swift and straightforward task. Before diving into the new faucet’s setup, understanding how to efficiently disassemble the old one is essential for a smooth transition. This involves carefully separating various parts like the handle, spout, and base, which may seem daunting at first, but with practice, it becomes an easily manageable process.
Many homeowners opt to install a handheld shower on their existing faucet, which can add significant convenience, especially in Arvada’s diverse climate. However, this might require additional disassembly to accommodate the new attachment. A skilled Gas Plumber Arvada will be familiar with these processes and can offer valuable guidance tailored to specific bathroom faucet replacement guide needs. By carefully documenting each step and keeping parts organized, you’ll find that the entire process is more achievable than it may initially seem.
For instance, a common scenario involves removing an outdated faucet to install a modern, low-flow model, which not only conserves water but also contributes to Arvada’s sustainable efforts. This task often reveals hidden damage or wear and tear, underscoring the importance of meticulous disassembly for proper repair or replacement. With the right tools and a systematic approach, you can efficiently remove and replace components, ensuring your bathroom faucet installation Arvada is both effective and cost-efficient.
Install New Faucet Parts: Step-by-Step Guide

Fixing a leaky faucet is a common home repair task that many homeowners can tackle with the right tools and clear guidance. If you’re considering a DIY bathroom sink faucet installation in Arvada, CO, this step-by-step guide will help ensure a successful, leak-free result.
First, gather all necessary parts, including any unique bathroom faucet ideas or best price on bathroom faucets that suit your style and budget. For instance, consider Moen single handle faucet repair kits, which are readily available and offer both functionality and affordability. Before beginning, consult the manufacturer’s instructions for specific models to ensure compatibility. Professional faucet installation in Arvada can cost 1-3 times more than a DIY project, so equipping yourself with knowledge and tools can save significant funds.
Start by shutting off the water supply under the sink using the shutoff valves. This prevents any accidental flooding during the bathroom faucet installation process. Remove the old faucet handle, often done by detaching the screws that secure it to the base. Next, unscrew and lift out the existing faucet aerator, the tip of the spout where water exits. Beneath this, you’ll find the supply lines and cartridges, which may require specialized tools for removal. Once these are accessible, carefully disassemble them, taking note of their connections and orientation.
Finally, install your new parts in reverse order. This typically involves inserting the supply lines first, ensuring they’re properly seated and secure. Then, place the cartridge and aerator back into position, tightening all screws by hand to avoid damaging threads. Before turning on the water, double-check all connections for any leaks. If everything is sealed tight, turn on the valves and test the new faucet’s functionality. Regular maintenance, such as periodic cleaning and check-ups, will ensure your newly installed bathroom faucet in Arvada continues to provide years of leak-free service.
Test and Adjust Water Pressure for Optimal Performance
A leaky faucet can waste a significant amount of water over time—up to 190 gallons per year for a single drop per second. To fix your Bathroom Faucet Installation Arvada quickly and effectively, testing and adjusting water pressure is an essential step that often goes overlooked but can dramatically improve performance. The optimal water pressure for most residential faucets falls between 45 and 60 psi (pounds per square inch). Water pressures beyond this range can lead to inefficient flow or even damage your fixtures.
For example, a commercial plumber Arvada might encounter a scenario where a high-pressure setting causes excessive splashing, while a lower pressure results in a weak stream. By adjusting the pressure regulator, they can achieve a balanced flow that minimizes waste and enhances user experience. This process involves locating the pressure adjustment knob—usually behind or beneath the faucet—and turning it clockwise to increase pressure or counterclockwise to decrease it. Gradual adjustments are key; sudden changes can lead to water hammering, a potentially damaging phenomenon caused by abrupt pressure shifts within pipes.
Moreover, regular boiler repair Arvada is crucial for maintaining optimal pressure levels. Over time, boilers can lose efficiency, affecting the pressure delivered to fixtures. A professional plumber in Arvada can inspect and service your boiler system, ensuring it operates at peak performance. Remember that the right water pressure not only conserves water but also enhances the overall functionality of your plumbing system, from faucet installation Arvada to commercial plumbing needs. By addressing pressure issues, you contribute to a more sustainable and efficient home environment.
By following a structured approach to Bathroom Faucet Installation Arvada, you can efficiently address a leaky faucet. Key insights include assessing the issue by identifying the source of leaks; gathering the necessary tools and materials tailored for bathroom faucet installation; and understanding when to turn off your water supply to prevent flooding. The step-by-step guide ensures successful replacement of old components, while testing and adjusting water pressure guarantees optimal performance. These practical steps empower you to tackle this common household repair with confidence and expertise.