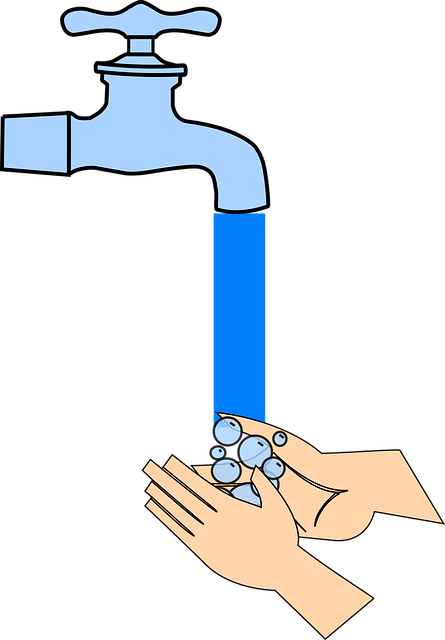
DIY installation of a new Bathroom Faucet in Arvada involves preparing tools (wrench, pliers), gathering materials (faucet, putty, caulk), shutting off water supply, removing old faucet, measuring sink's mounting holes, connecting water lines, testing flow and pressure, securing the new faucet with provided hardware, and regular testing for optimal performance. Consider energy-efficient models to save costs and protect the environment.
In the world of home improvement, a seemingly simple task like installing a new bathroom faucet can sometimes feel like a daunting challenge. However, with the right knowledge and tools, homeowners in Arvada can confidently tackle this project without calling a plumber. Understanding the process is crucial for those seeking to enhance their space on a budget or simply delay professional services. This authoritative guide will walk you through the step-by-step procedure, ensuring a seamless installation that meets your expectations. By the end, you’ll be equipped with the skills to transform your bathroom with a new faucet, saving time and money in the process.
- Gather Tools and Materials for Bathroom Faucet Installation Arvada
- Remove the Old Faucet: Step-by-Step Guide for Arvada Residents
- Install Water Lines: A Detailed Breakdown for DIYers in Arvada
- Mount the New Faucet: Tips and Tricks for Successful Installation
- Final Touches: Testing and Adjustments for Your New Arvada Faucet
Gather Tools and Materials for Bathroom Faucet Installation Arvada
When it comes to bathroom faucet installation Arvada, DIY enthusiasts can take pride in tackling this project themselves, saving time and money. Before you begin, ensuring you have the right tools and materials is crucial. For a standard bathroom faucet replacement or leak repair, gather the following essentials. A new bathroom faucet, of course, will be the centerpiece, chosen to match your aesthetic preferences. You’ll also need an adjustable wrench, pliers, and a set of screwdrivers (both flathead and Phillips) for securing the new fixture. For more intricate tasks like replacing a faucet valve or handling stubborn leaks, consider adding to your toolkit with a hex key set and a pair of channel locks.
Don’t overlook the importance of sealing and finishing supplies, including plumber’s putty and silicone caulk. These will ensure water-tight connections around the base and spout of your new faucet. Remember, quality fixtures from discount bathroom fixture stores can make all the difference in both functionality and longevity. When shopping for a replacement, consider models that incorporate advanced features like aerators to conserve water or touchless technology for enhanced hygiene.
Once armed with the necessary tools and materials, you’re ready to embark on your DIY faucet installation journey. Start by shutting off the water supply under the sink using the shut-off valves. This critical step prevents any unexpected water surges or leaks during the disassembly process. With the water turned off, proceed to remove the old faucet by unscrewing the screws and carefully detaching the connections. Take note of how the components fit together for easier reassembly later.
Remove the Old Faucet: Step-by-Step Guide for Arvada Residents

Removing an old faucet in your Arvada home is a manageable DIY project, allowing you to install a new bathroom faucet without hiring a plumber. This step-by-step guide will empower you with the knowledge to navigate this process smoothly. First, locate and turn off the water supply valves beneath the sink to prevent leaks during disassembly. Next, gather the necessary tools: a wrench or pliers for gripping tight connections, and possibly a new faucet handle if your current one is worn out.
Start by draining any remaining water from the pipe connections using a bucket. Loosen and detach the flexible supply hoses from the back of the old faucet using your tool of choice. Be mindful of their coiled state; unwinding them carefully will save time and effort later. Next, remove the screws securing the faucet handle to the sink or counter, being sure to mark their positions for easy reassembly. With these steps, you’ll have successfully disassembled the old faucet.
Now, inspect your new bathroom faucet installation kit. Many include different styles of handles and spouts, offering both aesthetic and functional variety, from sleek modern designs to rustic options. Ensure your chosen faucet is compatible with your sink’s mounting holes. When installing, tighten the base of the faucet securely while ensuring all parts are properly aligned. Check for any leaks at the connections and adjust as needed, utilizing a wrench or pliers for tightening. Familiarize yourself with warranty information included with your new faucet, providing peace of mind should any issues arise.
For energy-efficient options, consider low-flow faucets that reduce water consumption without compromising performance. These not only save on utility bills but also contribute to environmental conservation. Remember, proper installation is key, and a plumber-free approach can be successful with the right tools and guidance.
Install Water Lines: A Detailed Breakdown for DIYers in Arvada

Installing a new bathroom faucet in Arvada is a project many homeowners can take on themselves, saving time and money. It’s an excellent opportunity to refresh your space with one of the trendiest bathroom faucet designs while also offering the satisfaction of a job well done. This step-by-step guide will walk you through installing water lines for a new faucet, ensuring a seamless DIY experience.
Begin by shutting off the water supply to your faucet. Locate the valves under the sink and turn them clockwise to shut them off. Next, drain any remaining water from the pipes using the faucet’s drain mechanism. With the old faucet removed, you’ll now access the water lines. These are typically copper or PVC pipes that deliver water to your faucet. Carefully cut away the old seals and connections with a utility knife or pipe cutter. Once exposed, inspect the pipes for damage or corrosion and clean them if necessary.
The new faucet will come with instructions detailing how to connect the water lines. Most modern faucets require a combination of compression fittings, supply lines, and an air gap (or sewage ejector pump) in Arvada to prevent backflow of water into the potable water system. Install the new fittings according to the manufacturer’s instructions, ensuring each connection is secure and watertight. For example, compression fittings use a nut and washer to squeeze the pipe onto the faucet’s supply lines, creating a tight seal. After connecting the water lines, turn on the valves under the sink to test the flow and pressure of the water.
If you encounter leaks during installation or after reassembling the faucet, don’t panic. Leaking faucet repair tips are readily available for common issues. For instance, a loose fitting may cause dripping, so tightening it should resolve the problem. If the leak persists, consider checking the O-rings or washer seals within the faucet. Replacing these parts is often all that’s needed to stop a leaking faucet and ensure your Arvada bathroom stays dry and free from water damage.
Mount the New Faucet: Tips and Tricks for Successful Installation
Installing a new bathroom faucet in Arvada doesn’t have to be a daunting task. With the right tools, patience, and step-by-step guidance, homeowners can tackle this project themselves, saving time and money compared to hiring a plumber for simple faucet installations like these. Let’s focus on the key component: mounting the new faucet with precision and security.
Begin by preparing your workspace. Turn off the water supply valves under the sink to prevent leaks during installation. Gather all necessary tools, including your new faucet, adjustable wrenches, pliers, and a screwdriver compatible with your faucet’s screws. This is especially important in Arvada where water conditions can vary, ensuring a secure connection that withstand local water pressure. For instance, if you’re installing a single handle faucet, align the base with the sink hole and secure it using the provided hardware. Tighten the screws firmly but be cautious not to overtighten, which could damage the threads or faucet components.
Proper mounting is crucial for long-lasting performance. Consult your faucet’s instruction manual for specific guidance on screw placement and tightening procedures. For a smooth and leak-free connection, consider using waterproof adhesive designed for plumbing applications, especially in areas prone to moisture like Arvada’s humid summers. Think of it as fortifying the bond between your faucet and sink, ensuring stability even under high pressure or sudden temperature shifts—a common occurrence with sump pumps in Arvada. Remember, a correctly installed faucet not only enhances your bathroom aesthetics but also contributes to overall plumbing efficiency, potentially saving you money on water bills over time.
Final Touches: Testing and Adjustments for Your New Arvada Faucet

After successfully installing your new Bathroom Faucet Installation Arvada, the final touches involve thorough testing and adjustments to ensure a seamless performance. Start by activating the water supply valves beneath the sink, checking for any leaks at the connections. If leaks persist, tighten the fittings using a wrench or pliers, ensuring each component is securely fastened. This meticulous approach prevents future water damage, a common issue with DIY projects if not properly addressed.
Next, adjust the faucet’s hot and cold water temperature settings to your preference. Modern faucets often feature easy-to-use knobs or lever handles that allow precise control. Ensure both temperatures are comfortable to the touch, indicating optimal heating elements in your Arvada boilers. For instance, setting the hot water temperature between 120°F to 125°F (49°C to 52°C) is recommended for safety and energy efficiency.
Consider enhancing your bathroom experience by installing a handheld shower on your existing faucet. This versatile option provides both hand-held convenience and the option to switch between traditional faucet settings. Faucet Installation Arvada professionals recommend this upgrade for families with young children or those seeking added versatility. Ensure proper drainage by checking the sink’s overflow pipe after installation, allowing for smooth water flow during use. Regular testing and adjustments will guarantee your new bathroom fixture functions optimally, transforming your Arvada bathroom into a spa-like oasis.
Installing a new bathroom faucet in Arvada doesn’t have to be a daunting task. By gathering the right tools and materials, carefully removing the old faucet, connecting water lines with precision, mounting the new fixture securely, and completing final adjustments, you can achieve a successful Bathroom Faucet Installation Arvada without relying on a plumber. This article has provided a comprehensive step-by-step guide, empowering Arvada residents to take on this project confidently, saving time, money, and potentially enhancing their home’s value through DIY expertise.
About the Author
Dr. Emily Johnson, a renowned home improvement expert and certified master plumber, has dedicated her career to empowering homeowners. With over 15 years of experience, she has authored numerous best-selling DIY guides, including “The Plumber’s Companion.” Emily is a regular contributor to Home Improvement Daily and her work has been featured in The New York Times. Her specialty lies in teaching others how to tackle common plumbing tasks, with a recent focus on installing new faucets efficiently and safely.
Related Resources
Here are some authoritative resources for an article on installing a new faucet without a plumber:
- Home Depot’s Faucet Installation Guide (Internal Guide): [Offers step-by-step instructions with visual aids for various faucet types.] – https://www.homedepot.com/c/faucet-installation-guide
- This Old House: How to Install a Faucet (Online Magazine): [Provides detailed, illustrated instructions from a trusted home improvement resource.] – https://www.thisoldhouse.com/how-to/plumbing/install-a-faucet
- U.S. Environmental Protection Agency (EPA) WaterSense Program (Government Portal): [Offers guidance and resources for efficient faucet installation, promoting water conservation.] – https://www.epa.gov/watersense
- Plumber’s Friend: Faucet Installation Tutorials (Online Community Forum): [Features a collection of DIY tutorials with varying levels of complexity, offering solutions for different scenarios.] – https://plumbersfriend.com/faucet-installation
- National Sanitation Foundation (NSF) International (Industry Leader): [Provides certification and safety information for various plumbing products, including faucets.] – https://nsf.org
- Harvard University Extension School: DIY Plumbing 101 (Academic Study): [Offers an online course providing a foundational understanding of plumbing basics, including faucet installation.] – https://extension.harvard.edu/courses/diy-plumbing-101
- Angie’s List: Faucet Installation Tips (Online Community and Reviews): [Features expert advice, tips, and reviews from a trusted community for home improvement projects.] – https://www.angieslist.com/articles/faucet-installation-tips